I finished Part 2 of the wallet-making guide today. Sorry that it took so long; apparently I'm a slacker. I also made a permanent "Page" for the guide.
Anyway, more to come soon. As always, I welcome your comments.
Wednesday, August 17, 2011
How To Make The Best Duct Tape Wallet - Part 2
So now you've got a wallet, made out of duct tape, that can hold money. But wouldn't it be nice if it could hold plastic money as well? In this part of my duct-tape wallet guide, I'll give you step-by-step instructions and show you how to add credit card pockets to your wallet.
Additional tools used in this part: masking tape, colored pencil
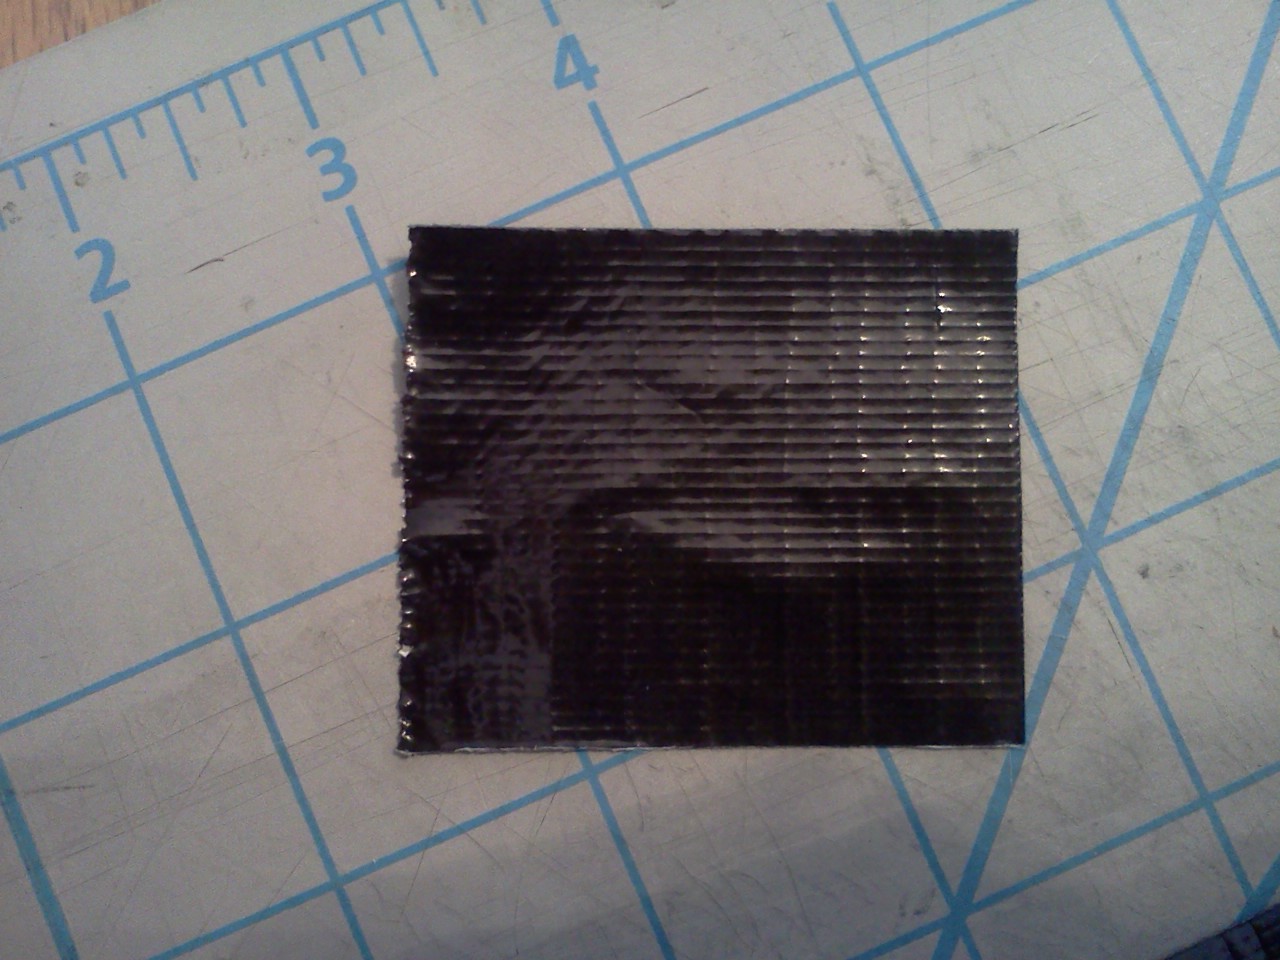
Make the pocket sheets. Make a sheet the same way you did for the wallet itself, but smaller this time. You want it to be 3.5 in. x 1.5 in.
Then do that five more times so that you have six pocket sheets.
Now we are going to use the other 3.5 in. strip to attach the other side of the pocket. Tear off your masking tape and fold the pocket over.
Use the strip on this side as well. The reason we do both sides is so that the adhesive from the front strip is never exposed to your cards; you really don't want to get sticky crud all over your plastic.
Now we have to do the sides. Once again, we don't want any adhesive to touch your cards, so simply taping the pocket down will not do. This time, we'll do the inside first, but it's a bit tricky.
Rip a strip, at least two inches long and lay it on your board. Cut the edges clean, and cut it in half long-wise. Now, you want to use your knife to cut the strips into this shape:
The bottom of each triangle should be 1.5 in. from the edge. I use the ruler and my knife to create little nicks in the tape to mark the place. Then, again using the ruler, I make the diagonal triangle cut from those points.
Now, fold the outside behind the pocket, and press it to the body of the wallet.
Doing this fold-over can be rather difficult. I find it's easier to get each side started one at a time instead of trying to do both at once. And if you want, you can make the process a bit easier by cutting off the bottom corners before folding:
Other than the spacing, the procedure for these next two pockets are the same as for the first.
At this point, I like to give the interior of my wallet a bit of decoration, just to break up the monotony. Grab your secondary color, and cut a strip about half an inch wide and 3.5 in. long. Stick this on the front pocket just below its lip.
Additional tools used in this part: masking tape, colored pencil
Step 7
Make the pocket sheets. Make a sheet the same way you did for the wallet itself, but smaller this time. You want it to be 3.5 in. x 1.5 in.
 |
| Diagonal cuts on the corners to make a nice fold-over tab, remember? |
 |
| Six-of-a-kind. |
Step 8
Attach the pockets. Alright, remember that we are going to do three pockets on each side. I'm going to start with the top left pocket. Use a credit card or gift card to determine its position--you want the gift card to be just about even, maybe a bit lower, than the top of the wallet. The left side of the pocket should be just about at the edge of the wallet's side. Once you have it placed, use some masking tape to hold it still.
Now, rip off a strip of duct tape and cut it so that it's 3.5 in. long. Then, cut it in half long-wise. Take one of these 3.5 in. strips and use it to attach the pocket: align its edge with the pocket, and place it so that it's half on the pocket and half on the wallet. As always, smooth it nicely.
 |
| Masking tape prevents the pocket from moving around when you first attach it. Make sure the smooth side of the pocket is on the outside. |
 |
| Side view of the pocket being attached. Sorry that it's a bit hard to see; the black-on-black makes it tough. |
 |
| Fold it down flat. |
 |
| The pocket is attached, and no adhesive is exposed. |
Rip a strip, at least two inches long and lay it on your board. Cut the edges clean, and cut it in half long-wise. Now, you want to use your knife to cut the strips into this shape:
 |
| Each strip has two triangular points. |
Then do the same thing, but with the triangles going in the other direction. Afterwards, cut the tops off of the triangles (for both sets), as in the picture.
 |
| Triangles going the other way. Also, they've been decapitated. |
These oddly-shaped things you've just made are for two pockets; thus you'll have to do this two more times to finish all six pockets. I only do one set at a time, however, so that I don't cover up my cutting board.
The triangles are facing different ways because one is for the left side of the pocket and the other for the right. So, peel off a strip and place it like this:
 |
| The angled side of the inner triangle flap should be adjacent to the side of the pocket. (If you understood that last sentence without referring to the picture, congratulations.) The reason for this is so that when you fold it down, the flap does not get in the way of anything. The reason for having flaps at all is because it is stronger than not having flaps. |
Then fold down the flap:
Do the same for the other side.
 |
| Flap! |
 |
| The other side is the same, but mirrored. |
 |
| The outside flap is now tucked under the pocket. It protects your cards from exposed duct tape adhesive. |
 |
| It's OK; you can use scissors to make this cut. |
Phew! It was a long process, but congratulations--a pocket hath been made.
Continue by making two more pockets on that side. You'll want the bottom of the bottom pocket to be just about touching the bottom of the wallet (Buh?!), and you'll want even spacing between them. For my wallet, I found that placing the next pocket 5/8 in. lower than the previous pocket yielded a nice result. Play around with the positioning and spacing until you think it looks nice. Then, tape it on so it doesn't move.
 |
| Again with the masking tape. |
Step 9 (Optional)
Add some color. Alright, you've done three pockets. Good job--you're halfway there! ...But it looks kinda flat.
 |
| Black on black on black on black. Wooo. |
 |
| Now it's blue on black on black on black on black! Hooray! |
Of course, remember to do this when we add the other side's pockets, else your wallet may look a bit ridiculous.
Also of course, you are free to skip this step, but I think it's a nice touch that is really easy and makes the wallet that much better.
Step 10
Seal the outer side of the pockets. This step is pretty intense. Get ready.
Perhaps you've noticed that there is exposed adhesive on the sides our pockets. Of course we must cover this. To do so, we'll place a strip of duct tape on the outside of the pockets. To make this strip strong, we'll make flaps that fold into the pockets. This may take you a couple of tries.
Rip off a strip and lay it on your board. Now you need to mark a line on the tape, but only temporarily. I've found that colored pencil works pretty well, making a line that is barely visible, but visible enough, and it wipes right off when you're done with it. Use the ruler and the colored pencil to draw a line about a half inch from the edge of the strip.
Remember that I made the distance between my pockets 5/8"? That's important. If you chose a different value, you'll have to compensate accordingly. Now, cut this pattern:
The other thing to note is that the outer sealing pattern will be the same, but upside down (but you probably figured that out). Like so:
Remember that I made the distance between my pockets 5/8"? That's important. If you chose a different value, you'll have to compensate accordingly. Now, cut this pattern:
 |
| Thick lines represent cuts. If you want, you can make a cool triangle or whatever other shape to show off that spunky blue stripe we made in the previous step (that's the "optional" thing in the picture). |
Those two trapezoids should come in about half an inch from each end. These will make flaps to fold over the top and bottom of the wallet. The three cuts at 2", 2-5/8", and 3.25" will make flaps that will be folded into the three pockets. This will strongly seal the outer side of the pockets, while not covering any part of them up.
To actually make these cuts, use that colored pencil line you marked on the tape. The top point of each flap (in the above picture, where it meets the dotted line) should be half an inch from the edge of the tape (i.e., on your colored pencil line). Also, the bottom part of the end trapezoids should be on this line as well. I start by making a small nick with my knife at the 0.5", 2", 2-5/8", 3.25", and 4" marks on the ruler. I then make the cuts from there, since the angles aren't really important.
 |
| In this picture, you can barely see my blue colored pencil line. However, the nicks at the top of each flap are visible. When making these cuts, make sure they are clean. Really dig your knife in if necessary (remember: be careful), or go over them twice. It's a real pain if you need to fix them after lifting the strip off the board. |
 |
| This is a bit tough. I find the easiest way is to line up the front-most pocket with its tab first, and then if you measured and cut correctly, the other tabs should be in place as well. Fold each one down into its pocket one at a time. Then, fold the trapezoid tabs over the wallet itself, like you did in Step 6. For folding over onto the other side, you can cut a triangle in the middle to make it easier, like I suggested in Step 4. |
 |
| All sealed. |
Step 11
Do the other side. Attach your pockets on the other side the same way we just did for this side. However, here are a few notes.
When placing each pocket, make sure it is lined up with the pocket on the other side. One reason is aesthetics--the pockets look better overall if they aren't at different angles. The other reason is that it makes it a lot easier when we have to seal the middle.
 |
| Use your ruler to make sure the pockets are lined up and at the same angle. Do this for each pocket before attaching it. |
 |
| It's the same as before, but for the right side. |
Step 12
Seal the middle. Alright, left and right pockets are attached, their outsides are sealed, but alas! There is still pesky exposed adhesive between them. In this step, we are going to cover that up, using pretty much the same technique as we did for the outsides. However, this is a bit tougher, since we want to seal both the left and right side pockets with only one piece of duct tape. Why? Well, ideally, you will minimize the amount of tape on a fold, so that it can fold easier. And since it would be better to use one piece of tape, and these instructions are for the best duct tape wallet, we're doing it. Even though it's harder. (Of course, if you find it to be too difficult, you can make two separate, overlapping pieces for each side--it's your wallet, after all.)
Now place it on your wallet and fold the flaps into the pockets, as you did for the outer seals.Once again, I find it is easiest to start by lining up the front-most pocket first, and working your way back. This is pretty tricky, but don't get discouraged.
Then, cut some triangles for the top and bottom to make for a nice fold-over:
Fold those over, and voila! You have a completed and usable duct tape wallet!
But this still isn't the best duct tape wallet. It's kinda plain: just a billfold and some credit card pockets. So next we'll add some extra features and personalizations.
The first thing to do is measure the distance between your pockets. This is your Between-Distance.
Then, cut that pattern from Step 10 into a strip of duct tape, except this time put it on both sides. After doing one side, use your Between-Distance to find where to draw your line for the other side. You should end up with something like this:
 |
| It's a weird number because I didn't put the pockets exactly against the edge of the wallet. That's OK though. |
 |
| My triangles are a bit off. Meh. |
 |
| Flaps in! |

Fold those over, and voila! You have a completed and usable duct tape wallet!
 |
| Everything I need to ride the subway, buy books, buy my household goods, and be awesome because I have a duct tape wallet. |
Wednesday, June 22, 2011
Making a Double Billfold
So you want a double billfold for your duct tape wallet? Not a problem! Just follow this step-by-step guide, and you'll see that it's quite easy to do.
I'm assuming you've just completed Step 5 of my wallet-making guide. This is the time when adding the extra billfold is easiest.
Basically what we are going to do is insert a divider into the billfold. I'm making a black wallet, but I'm going to make the divider out of navy blue duct tape, both for coolness and so that it will stand out in the pictures.
Man, that was a tough step.
Use one of these strips to attach the divider to the wallet. You want it to be roughly centered on the divider, with half on the divider and half on the wallet. Once it's in a good spot, press it down and smooth it out as always.
Then, flip the divider over. If necessary, peel the adhering strip back a bit; you want it to be stuck onto the wallet only as far as your center crease.
Now, use the other half of that strip to adhere this side of the divider too. Try to line it up with the one on the other side, so that all the adhesive is covered. If you can't get it perfect, that's OK, of course. Once you have it positioned, press and smooth it.
And that's it! The reason for putting the divider slightly above the crease is so that there will be a small "gap" between the divider and the wallet. This acts almost like a hinge, and lets the divider fold and move easily. We'll be using this technique again later when we add an ID slot.
Now that you've added the double billfold, you can go back to making your wallet.
Step 1
Make a sheet. Do it the same way you did before. This sheet needs to fit inside your wallet, and you don't want it to stick out. My wallet is 8 in. by 3.5 in., so I'm going to make the divider 7.75 in. long and 3 in. tall. It's shorter so that it will fit inside easily. |
| Making a 3 in. by 7.75 in. sheet. Remember: Nice clean edges. |
 |
| Almost done. |
Step 2
Place the divider sheet. Put it a little bit above your center crease.Man, that was a tough step.
Step 3
Attach the divider sheet. Rip a strip of duct tape off your roll. Cut it so that it's slightly shorter than 7.75 in. long (7 inches or so) using your Xacto knife (make sure to have clean edges on both sides). Then, cut it in half longwise, so that you end up with two skinny strips; and don't worry, it doesn't have to be perfect.Use one of these strips to attach the divider to the wallet. You want it to be roughly centered on the divider, with half on the divider and half on the wallet. Once it's in a good spot, press it down and smooth it out as always.
Then, flip the divider over. If necessary, peel the adhering strip back a bit; you want it to be stuck onto the wallet only as far as your center crease.
 |
| You should be able to see some adhesive. |
 |
| Close to perfect. |
 |
| Tada! Completed double billfold. |
Friday, June 17, 2011
How To Make The Best Duct Tape Wallet - Part 1
Welcome! This is my step-by-step guide with complete instructions for how to make a duct tape wallet (and it includes pictures!). These instructions will be for a bi-fold wallet, but you can add a third fold if you want. We are going to start with the "core" of the wallet, and then I will show you how to make various cool and awesome expansions.
For this tutorial I'm going to make a black wallet with a navy blue accent.
This wallet will have 6 pockets for cards; three on each side. As you can see in the picture, a normal card is slightly less than 3.5 inches wide, so we can make each of our pockets 3.5 inches. Therefore, the wallet needs to be at least 7 inches wide, which is also enough to cover the bills.
However, there also needs to be some room between each side for the wallet to fold. How much room you give it is up to you, but it's better to be on the generous side. Half an inch would be the bare minimum, I would say. If you are planning on having a lot of cards (I have well over six), then it should be wider. If you plan on adding an ID slot (instructions soon), then it should be wider. For this wallet, I am going to use an inch of fold width, making the total width 8 inches.
The height of the wallet will be 3.5 inches. I chose this rather arbitrarily, but the wallet needs to be tall enough to hold the bills and the three card slots on each side. 3.5 inches can do this comfortably.
Make the sheet. When making wallets, as in almost all duct tape craft, the basic unit is what I like to call a "sheet." This is a piece where no part of the sticky-side is showing; it's like holding a piece of leather in your hands. Except that it's duct tape.
This first sheet will be the main part of the wallet. I decided my wallet will be 8 in. by 3.5 in., so therefore the sheet will be 8 in. by 7 in. Why? Because we are going to fold it in half to make the billfold.
Question: Could I make two 8 in. by 3.5 in. sheets and stick them together? Yes, but don't. That adds an extra seam to your wallet which is not necessary. It also adds a slight amount of thickness. It's really easier just to make one big sheet, although it may not seem it at first.
To make the sheet, rip off some long strips of duct tape (over 8 inches long) and lay them on your cutting board. They should partially overlap each other. Use as many strips as it takes to make it 7 or more inches tall--I managed it in four. A ruled cutting board is really handy here. Make sure to smooth out any air bubbles after laying each strip.
 Note that I made the strips longer than necessary on both sides. This is because we are going to cut the sides using the Xacto knife. Why? Because they're hideous, and if you used a "ripped" edge in your wallet it will bring the quality way, way down.
Use your Xacto knife and your ruler to cut the duct tape into an 8 in. x 7 in. rectangle. Remember: measure twice, cut once. Be sure to hold your ruler firmly, and be VERY CAREFUL with the knife so as to not cut yourself.

Do this for all corners. When you are finished, peel away the excess and you should have something like this:
Peel your sheet off the board and flip it over. Carefully fold the edges over. You want the fold to be straight and smooth. I recommend starting in the center of each edge and working your way outward.
Once you've done all the edges, you have a completed sheet! By this same process, you can make sheets of any size. And we will be making more sheets.

Fold the inner two triangle flaps over. Be sure to fold the top one into the wallet, so as to not cover your billfold.
Now, fold the strip over to the other side.
Step 1
Get your tools ready. You should have an Xacto knife, a clean cutting mat, and a metal-edged ruler. |
| Tools at the ready. My cutting board has seen its share of battle. |
Step 2
Choose your duct tape. Pick a good-quality tape; avoid the cheap, thin tapes you find at dollar stores and the like. They have weak adhesives and your wallet might fall apart after some use. I like to use two colors of duct tape just to make things more interesting--one as the main color and the other as an accent. Some color combinations I like are:- classic silver duct tape with a black or blue accent;
- black with a silver or blue accent;
- yellow with a black accent;
- or whatever else you can think of that's not ugly.
For this tutorial I'm going to make a black wallet with a navy blue accent.
Step 3
Determine the size of the wallet. Your wallet needs to be big enough to hold paper money (of course), and likely you'll want it to hold plastic money as well. |
| Hello, George. |
 |
| A gift card for bookin'. Wallets tend to hold these plastic things as well. |
This wallet will have 6 pockets for cards; three on each side. As you can see in the picture, a normal card is slightly less than 3.5 inches wide, so we can make each of our pockets 3.5 inches. Therefore, the wallet needs to be at least 7 inches wide, which is also enough to cover the bills.
However, there also needs to be some room between each side for the wallet to fold. How much room you give it is up to you, but it's better to be on the generous side. Half an inch would be the bare minimum, I would say. If you are planning on having a lot of cards (I have well over six), then it should be wider. If you plan on adding an ID slot (instructions soon), then it should be wider. For this wallet, I am going to use an inch of fold width, making the total width 8 inches.
The height of the wallet will be 3.5 inches. I chose this rather arbitrarily, but the wallet needs to be tall enough to hold the bills and the three card slots on each side. 3.5 inches can do this comfortably.
 |
| For clarity: the basic design of the wallet. It's a very fancy image, I know. |
Step 4
Make the sheet. When making wallets, as in almost all duct tape craft, the basic unit is what I like to call a "sheet." This is a piece where no part of the sticky-side is showing; it's like holding a piece of leather in your hands. Except that it's duct tape.
This first sheet will be the main part of the wallet. I decided my wallet will be 8 in. by 3.5 in., so therefore the sheet will be 8 in. by 7 in. Why? Because we are going to fold it in half to make the billfold.
Question: Could I make two 8 in. by 3.5 in. sheets and stick them together? Yes, but don't. That adds an extra seam to your wallet which is not necessary. It also adds a slight amount of thickness. It's really easier just to make one big sheet, although it may not seem it at first.
To make the sheet, rip off some long strips of duct tape (over 8 inches long) and lay them on your cutting board. They should partially overlap each other. Use as many strips as it takes to make it 7 or more inches tall--I managed it in four. A ruled cutting board is really handy here. Make sure to smooth out any air bubbles after laying each strip.

 |
| Ripped edge vs cut edge. Note that the Xacto-cut edge is much straighter, smoother, and all around better. You want those in your wallet, not the messy ripped one on the left. |
After cutting, peel away the edges leaving just your beautiful rectangle.
 |
| Look at that clean edge. Gorgeous. |
Now, carefully peel your rectangle off of the cutting board, and flip it over, laying it down with the sticky side up.
 |
| Duct tape, sticky-side-up. |
We are now going to cover the other side with duct tape, leaving no stickiness exposed. Be careful at this step--once duct tape sticks to itself, it can be very hard to peel apart without ruining it. If you want, you can hold down the corners of your sheet with masking tape to make sure it doesn't move. Now, very carefully, lay down a long strip over this sheet, with at least half an inch of the strip on the cutting board. Also, make sure it is longer than 8 inches, with a good margin on both sides. Press it flat against the cutting board, smoothing out any air bubbles, so that you can see the outline of the duct tape below. Here's a picture:
That first one is the toughest, but now the tape is affixed to the board and won't move. Cover the entire sheet in this fashion, being sure to leave a good margin around all sides.
Once it is covered, use your knife to cut clean, straight edges all around. I usually do 0.75 in. - 1 in. margins. Then, cut each corner at an angle, like this:
 |
| Here you can see the long straight margin cut, as well as the corner cut. |
 |
| Try to get those corners as close to the real corners as possible. |
If you haven't guessed it yet, we are going to fold those margins over to make a sheet with nice, smooth edges. These sides are kinda long, though, so if you want to make the folding easier, you can cut each margin in half.
 |
| Makes folding easier. |
 |
| If a wrinkle or some other bad thing happens, try to peel it back and start again. |
Phew! That was a long step. Maybe I should break it down into substeps.
Step 5
Fold it. Now we turn this sheet into a billfold. Fold the sheet in half, but not exactly in half; one side should be higher than the other, and the corners pressed slightly inward on both sides. This makes something of a pocket, which gives us easier access to the billfold when the wallet is opened. Take a look at the pictures to see what I mean:
 |
| The top half of the sheet is slightly higher than the bottom and more towards the middle of the sheet. To make later steps easier, you can hold the sides in this position with a small piece of tape. |
 |
| The back side is straight, but the closer side is popped out, making a convenient pocket. |
Get a nice crease on that fold. Then fold the wallet down the center, putting a nice crease there too.
Hey! Want to add a double billfold to your duct tape wallet? Now's the time to do it. Click here for instructions.
Step 6
Make the sides. Lay your folded-in-half sheet on the cutting board, and rip a good-sized strip from your roll. Holding your soon-to-be-wallet in place, lay the strip on top of it, with about half the strip on the wallet and half on the board. Press it down firmly, smoothing it as always.
 |
| Note that the corner is still the way we put it in Step 5. |
Next, cut off the ugly rip-edge, and cut out a triangle at each corner. This makes four "triangle flaps."

Lift your wallet off the board, and flip it over. Make sure your triangle points are touching the corner of the wallet. If necessary, make a few small correction-cuts.
 |
| The point of the incision should be a bit more to the left, touching the corner of the wallet. If it is not fixed, it will make a weird little nub after we fold it. |
 |
| Makin' progress. |

Once again, check your triangle flaps. Cut them if necessary. Once they're OK, fold them over too.
Now, repeat that for the other side, and voila! You have a completed billfold! And it's made of duct tape! Awesome!
 |
| This needs to be trimmed. You can see how if it was folded as is, a little point would be sticking out. |
In part 2, I'll show you how to add the credit card slots. Hope to see you next time, and I welcome your comments!
Subscribe to:
Posts (Atom)